
Gipfeli Recipe
Make 12 golden, buttery Swiss Gipfeli at home with this easy step-by-step recipe. Less tricky than French croissants, crispy outside, soft inside.
Published: Oct 13, 2025 | By Ilyas Siaghy
The first time I tried making a homemade Gipfeli Recipe, I was convinced it would be far too difficult for a regular weekend bake. Swiss bakeries make these buttery crescent-shaped pastries look effortless, with their flaky golden layers and soft, delicate texture. But after testing this recipe several times in my own kitchen, I discovered that making authentic Swiss Gipfeli is actually much easier than most people think. Now, this has become one of my favorite breakfast treats to bake for slow mornings with coffee or brunch with family.
Unlike classic French croissants, a traditional Gipfeli Recipe has a slightly softer texture and a rich buttery flavor that feels comforting without being overly heavy. The dough is simple to work with, and the result is beautifully crisp on the outside while staying tender inside.
If you have been searching for the best homemade Gipfeli Recipe, this easy step-by-step version will help you create bakery-style Swiss croissants from scratch. Whether you are new to pastry baking or already love making homemade bread recipes, these buttery Swiss Gipfeli are guaranteed to impress. Serve them warm with jam, honey, or coffee for the perfect European-inspired breakfast experience.
Tools You’ll Need
- Stand Mixer 5 Quart Tilt Head
- French Rolling Pin (17 Inches)
- Digital Kitchen Scale
- Unbleached Parchment Paper Roll
- Silicone Pastry Brush
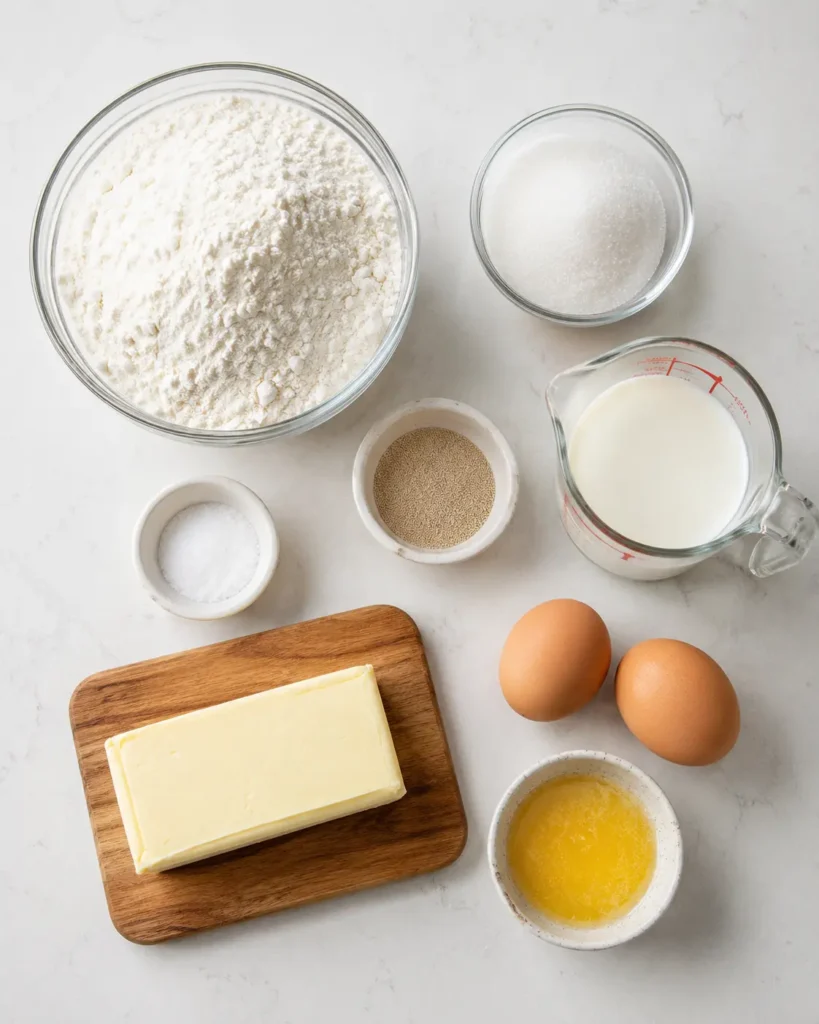
Ingredients You’ll Need for Perfect Gipfeli
For the Dough:
- 4 cups (500g) all-purpose flour, plus extra for dusting
- 1/4 cup (50g) granulated sugar
- 2 teaspoons (7g) instant yeast
- 1 1/2 teaspoons (9g) salt
- 1 1/4 cups (300ml) whole milk, lukewarm
- 1/4 cup (60ml) water, lukewarm
- 3 tablespoons (42g) unsalted butter, melted
- 1 large egg (for the dough)
For the Butter Layer:
- 1 cup plus 2 tablespoons (250g) cold European-style unsalted butter
For the Egg Wash:
- 1 large egg
- 2 tablespoons milk
- Pinch of salt
Ingredient Sourcing Tips: The quality of your butter makes a huge difference in this gipfeli recipe. Personally, i always go with European-style unsalted butter
How to Make Gipfeli Recipe (Step by Step)
Step 1: Make the Dough (15 minutes active time)
- In a large mixing bowl or the bowl of your stand mixer (optional but recommended), combine the flour, sugar, instant yeast, and salt. Give it a quick whisk to distribute everything evenly.
- In a separate bowl, mix together the lukewarm milk, water, melted butter, and one egg. The liquids should feel just slightly warm to the touch, about body temperature. Too hot, and you’ll kill the yeast; too cold, and the dough won’t rise properly.
- Pour the wet ingredients into the dry ingredients. If using a stand mixer, attach the dough hook and mix on low speed for about 2 minutes, then increase to medium speed for 5-6 minutes until the dough is smooth and elastic. If mixing by hand, stir with a wooden spoon until combined, then knead on a floured surface for 8-10 minutes.
- The dough should be soft, slightly sticky, but pull away from the sides of the bowl. If it’s too sticky, add flour one tablespoon at a time. Too dry? Add water by the teaspoon.
I weigh all my ingredients using a digital kitchen scale, it makes a real difference with sourdough recipes where precision matters.
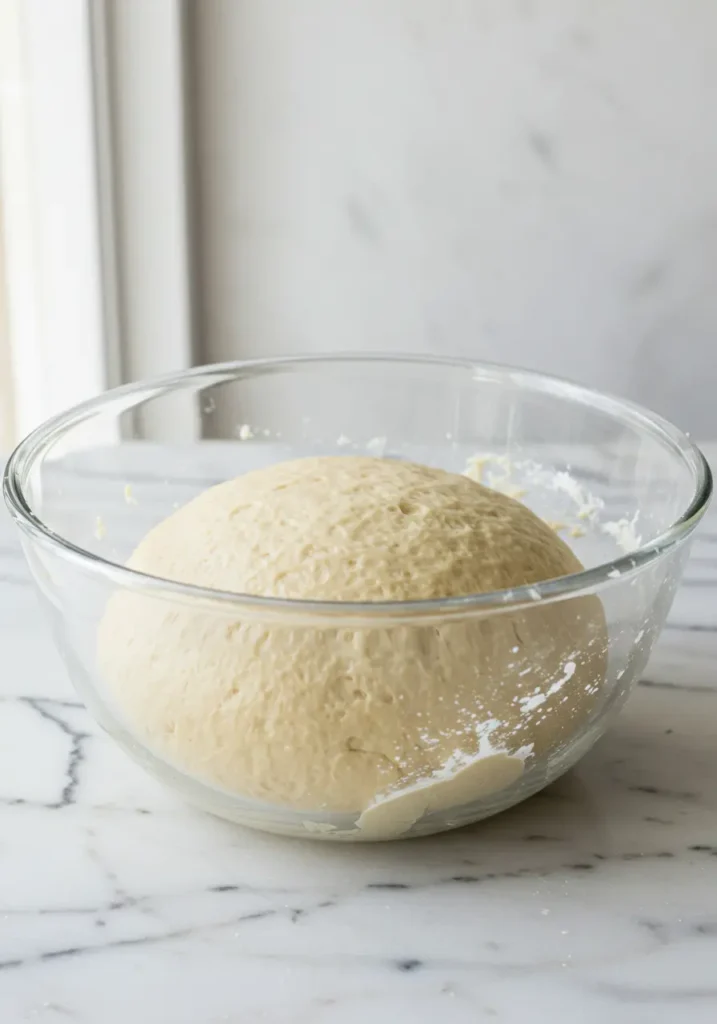
Step 2: First Rise (1 hour)
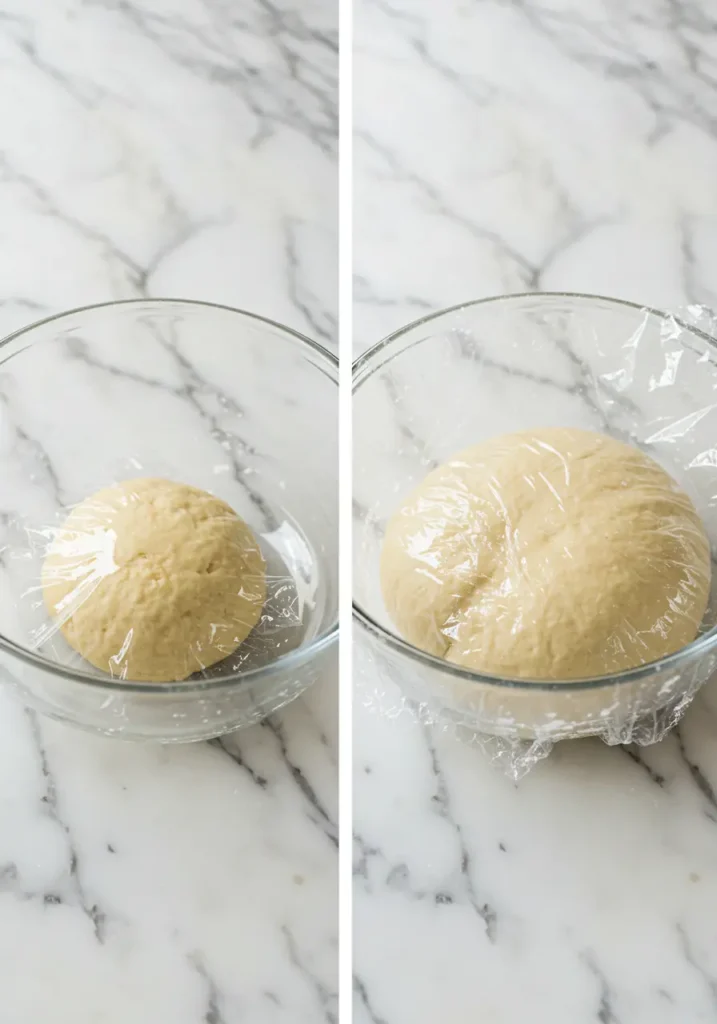
Shape your dough into a ball and place it in a lightly greased bowl. Cover with plastic wrap or a damp kitchen towel and let it rise in a warm, draft-free spot for about 1 hour, or until doubled in size.
Time-saving hack: While your dough rises, prep your butter block for lamination. This is when you can throw in a load of laundry or prep dinner, see? Multi-tasking magic!
Step 3: Prepare the Butter Block (10 minutes)
- This step is crucial for this gipfeli recipe! Cut your cold butter into small pieces and place them between two sheets of parchment paper. Using a french rolling pin, pound and roll the butter into a 7×10-inch rectangle. The butter should be pliable but still cold, think the consistency of your favorite modeling clay.
- If the butter gets too soft, pop it in the fridge for 10-15 minutes. You want it to be the same consistency as your dough so they roll together smoothly without the butter breaking through.
Step 4: Lamination – Creating Those Flaky Layers
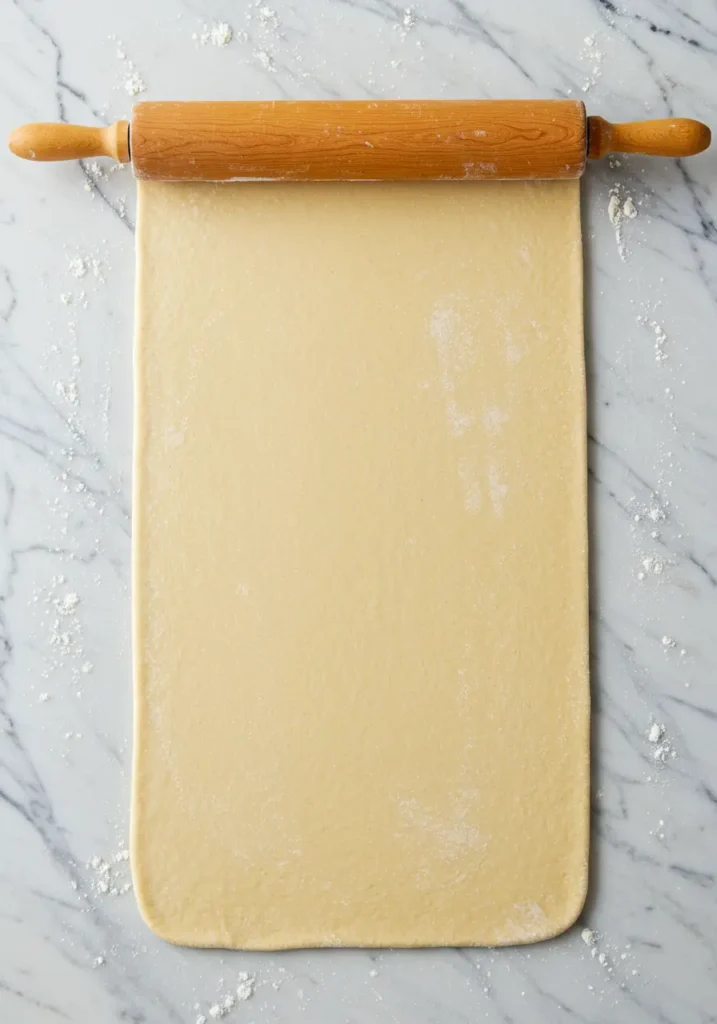
- Punch down your risen dough and roll it out on a lightly floured surface into a 10×20-inch rectangle.
- Place your butter block on the bottom two-thirds of the dough, leaving a small border around the edges. Fold the top third of the dough (the part without butter) down over the middle third. Then fold the bottom third up, like you’re folding a business letter. You’ve just completed your first “turn.”
- Rotate the dough 90 degrees so the fold is on your left (like a book). Roll it out again into a long rectangle (about 10×20 inches), then fold it into thirds again. That’s turn number two!
- Wrap the dough in plastic wrap and refrigerate for 30 minutes. This chilling time is essential, it keeps the butter from melting and maintains those distinct layers.
- Repeat this process one more time: roll out, fold into thirds, rotate, roll out, fold into thirds. That’s turns three and four. Refrigerate again for at least 1 hour, or up to overnight.

Beginner’s note: Don’t stress if your rectangle isn’t perfect or if a little butter peeks through. These gipfeli are forgiving! Just patch any butter breaches with a bit of flour and keep going. Learn How to Bake Croissants for Beginners!
Step 5: Shape Your Gipfeli (20 minutes)
- After the final chill, roll your dough out on a lightly floured surface into a large rectangle, about 12×24 inches and roughly 1/4-inch thick.
- Using a sharp knife or pizza cutter, trim the edges to create clean lines, then cut the dough in half lengthwise to create two long rectangles. Cut each rectangle into 6 triangles, you should have 12 triangles total.
- Starting at the wide end of each triangle, gently roll toward the point, stretching slightly as you go. Place each rolled gipfeli on a parchment-lined baking sheet, point-side down, and curve the ends slightly inward to create that classic crescent shape.
Pro tip: Keep your triangles similar in size for even baking. I like to use a ruler for the first few times until you get the hang of eyeballing it!
Step 6: Final Rise (1-2 hours)
Cover your shaped gipfeli loosely with plastic wrap or a clean kitchen towel and let them rise at room temperature for 1-2 hours. They should look noticeably puffier and jiggly when gently shaken. Don’t rush this step, a good final rise is the difference between dense pastries and airy, flaky ones!
Family-friendly tip: This is a perfect time to set the kids up with a movie or head out for a quick errand. Your gipfeli will be waiting when you return!
Step 7: Egg Wash and Bake (25 minutes)
- Preheat your oven to 400°F (200°C). While it heats, whisk together one egg, 2 tablespoons of milk, and a pinch of salt for your egg wash.
- Gently brush each gipfeli with the egg wash using a silicone pastry brush, being careful not to deflate them. This creates that gorgeous golden color and beautiful shine.
- Bake for 18-22 minutes in a nonstick baking sheet, rotating the pan halfway through, until the gipfeli are deep golden brown. They should sound hollow when tapped on the bottom.
- Let them cool on the baking sheet for 5 minutes, then transfer to a wire rack. Try to resist eating them all immediately (I know, it’s hard!).
Expert Tips for Perfect Gipfeli
Temperature Control is Everything
Keep your butter and dough cold during lamination! If at any point things start feeling greasy or the butter is melting, pop everything back in the fridge for 15-20 minutes. This gipfeli recipe relies on cold butter creating steam pockets that make those flaky layers.
Flour Your Surface Generously (But Not Too Much)
You want just enough flour to prevent sticking. Too much flour between layers will create dry spots in your finished gipfeli. I like to use a pastry brush to sweep away excess flour before folding.
The Window Pane Test
After kneading, stretch a small piece of dough between your fingers. If it stretches thin enough to see light through without tearing, you’ve developed enough gluten. This ensures your gipfeli will have structure to hold all those buttery layers.
Use a Bench Scraper
This inexpensive tool (often under $5) is your best friend for laminating dough. It helps you lift, fold, and keep clean edges on your dough rectangles.
Don’t Skip the Overnight Rest
While you can make this gipfeli recipe in one day, the flavor develops beautifully if you let the dough rest in the fridge overnight after lamination. Plus, it makes the process less rushed!
Delicious Variations to Try
Chocolate Gipfeli
Before rolling up your triangles, place a small piece of dark chocolate (about 1-2 teaspoons of chocolate chips) at the wide end. Roll as directed. These are absolute showstoppers for weekend brunch!
Almond Gipfeli
Brush the rolled gipfeli with egg wash and sprinkle with sliced almonds and a tiny bit of coarse sugar before baking. Elegant and delicious!
Ham and Cheese Gipfeli
For a savory twist, place a thin slice of ham and a piece of Gruyère cheese on each triangle before rolling. Skip the sugar in the dough if making a full savory batch.
Whole Wheat Gipfeli
Substitute up to half of the all-purpose flour with whole wheat flour for a heartier, more rustic gipfeli. You may need to add an extra tablespoon or two of liquid.
Mini Gipfeli
Cut your triangles smaller to make 20-24 mini gipfeli, perfect for kids or for entertaining. Reduce baking time to 12-15 minutes.

Dietary Modifications: While this traditional gipfeli recipe isn’t easily adaptable to dairy-free or vegan diets (butter is essential for the flavor and texture), you can experiment with plant-based butter alternatives designed for baking. Results will vary, but I’ve heard good things about Miyoko’s European-Style cultured vegan butter!
Storage and Reheating Instructions
Room Temperature Storage
Fresh gipfeli are best enjoyed the day they’re baked, but they’ll stay delicious for 2-3 days stored in an airtight container at room temperature. Don’t refrigerate them, this actually makes them stale faster!
Freezing Unbaked Gipfeli
This is my favorite trick! After shaping the gipfeli, place them on a baking sheet and freeze until solid (about 2 hours). Transfer to a freezer bag and freeze for up to 3 months. When ready to bake, place frozen gipfeli on a baking sheet, cover loosely, and let them thaw and rise at room temperature for 3-4 hours (or overnight in the fridge). Brush with egg wash and bake as directed.
Freezing Baked Gipfeli
Let baked gipfeli cool completely, then freeze in an airtight container or freezer bag for up to 2 months. Reheat from frozen at 350°F (175°C) for 8-10 minutes.
Reheating for That Fresh-Baked Taste
Pop room-temperature gipfeli in a 350°F (175°C) oven for 5-7 minutes to crisp them back up. Don’t use the microwave, it makes them soggy and chewy instead of flaky!
Busy morning hack: Keep a stash of frozen unbaked gipfeli and start them thawing the night before. Wake up to fresh-baked pastries with minimal morning effort!
How to Serve Gipfeli Croissants
Gipfeli croissants are best served fresh and slightly warm, when the buttery layers are at their flakiest and most aromatic. For a classic approach, place them in a basket lined with a clean kitchen towel to keep them cozy while serving. They pair beautifully with simple spreads like butter, honey, or fruit jam, which let the delicate flavor shine. For breakfast or brunch, serve Gipfeli alongside fresh fruit, yogurt, and a good cup of coffee or tea. You can also turn them into a light meal by slicing them open and filling them with cheese, eggs, or cured meats. If serving later in the day, a quick warm-up in the oven brings them back to life. Whether sweet or savory, Gipfeli croissants fit effortlessly into any table setting.
Pairings and Menu Recipe Ideas
Gipfeli Recipe FAQs
Can I make gipfeli without a stand mixer?
Absolutely! This gipfeli recipe works perfectly by hand. You’ll just need to knead the dough for 8-10 minutes instead of using a dough hook. It’s a great arm workout, and honestly, some bakers prefer the feel and control of hand-kneading.
Why didn’t my gipfeli get flaky layers?
The most common reasons are: butter that was too soft during lamination (causing it to blend into the dough), not enough chilling time between folds, or oven temperature that was too low. Make sure your butter is pliable but cold, and verify your oven temperature with an oven thermometer.
Can I prep the dough the night before?
Yes! In fact, I recommend it for busy families. After completing the lamination and folds, wrap the dough tightly and refrigerate overnight. The next day, let it sit at room temperature for 15-20 minutes before rolling and shaping. This actually develops better flavor!
What if I don’t have European-style butter?
Regular butter works in this gipfeli recipe, though European-style butter with higher fat content (82% vs 80%) does create slightly flakier results. If using regular butter, your gipfeli will still be delicious, just maybe a touch less rich.
My dough keeps shrinking when I roll it. Help!
This means the gluten is too tight. Let the dough rest for 10-15 minutes at room temperature, then try rolling again. If it continues to shrink back, your dough might be a bit too stiff, next time, add an extra tablespoon of water.
How do I know when my gipfeli are done baking?
Look for deep golden-brown color on top and slightly darker edges. The bottoms should be golden too. If you tap the bottom, it should sound hollow. Underbaked gipfeli will be doughy inside; overbaked ones will be dry. It’s better to go slightly darker than too light!
Can I make the dough in a bread machine?
Sure! Use the dough setting to mix and knead the dough, then proceed with the lamination process by hand. The bread machine won’t be able to do the folding and butter layers for you, that’s where the magic happens!

More Easy Breakfast Recipes to Try

Gipfeli Recipe: Buttery Swiss Croissants Easier Than You Think
Ingredients
Method
- In a large mixing bowl, combine flour, sugar, instant yeast, and salt. In a separate bowl, mix lukewarm milk, water, melted butter, and egg. Pour wet ingredients into dry ingredients and knead for 8-10 minutes until smooth and elastic.
- Shape dough into a ball and place in a lightly greased bowl. Cover and let rise for 1 hour until doubled in size.
- Cut cold butter into small pieces and roll between parchment paper into a 7×10-inch rectangle. Keep cold and pliable.
- Roll dough into 10×20-inch rectangle. Place butter block on bottom two-thirds. Fold into thirds like a letter. Rotate, roll, and fold again. Refrigerate 30 minutes. Repeat for 4 total turns.
- Roll dough to 12×24 inches. Cut into 12 triangles. Roll each from wide end to point. Place on baking sheet and curve ends inward.
- Let rise 1-2 hours until puffy. Brush with egg wash. Bake at 400°F for 18-22 minutes until golden brown.