
Sourdough English Muffin Recipe
Make fluffy sourdough English muffins with all the nooks and crannies you love, no kneading, no oven. Mix the dough the night before and cook them on the stovetop in minutes. Perfect for breakfast sandwiches, butter & jam, or toasting any day of the week.
Published: Dec 8, 2025 | By Ilyas Siaghy
Why You’ll Love This Recipe
There’s nothing like the smell of a sourdough English muffin toasting in the morning. I started making these after looking for a way to use up extra starter without babysitting a loaf all day, and one weekend test batch later, they’d become a permanent fixture in my breakfast rotation.
What makes them different from the grocery-store version: real sourdough tang, a golden griddled crust, and the deep nooks and crannies that only come from proper fermentation and a gentle hand (no rolling pin here). They’re no-knead, no-oven, and come together with basic pantry staples, active starter or discard both work.
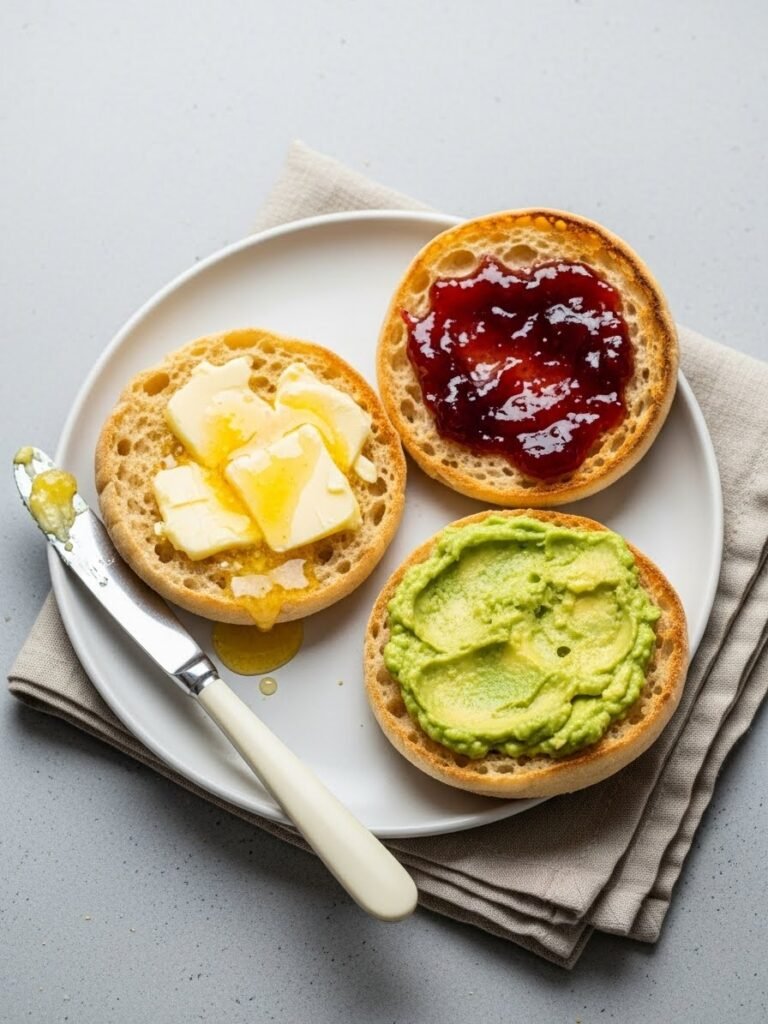
Toast one with butter and jam, stack two for a breakfast sandwich, or build an eggs Benedict base, once you’ve made these from scratch, the store-bought bag stays on the shelf.
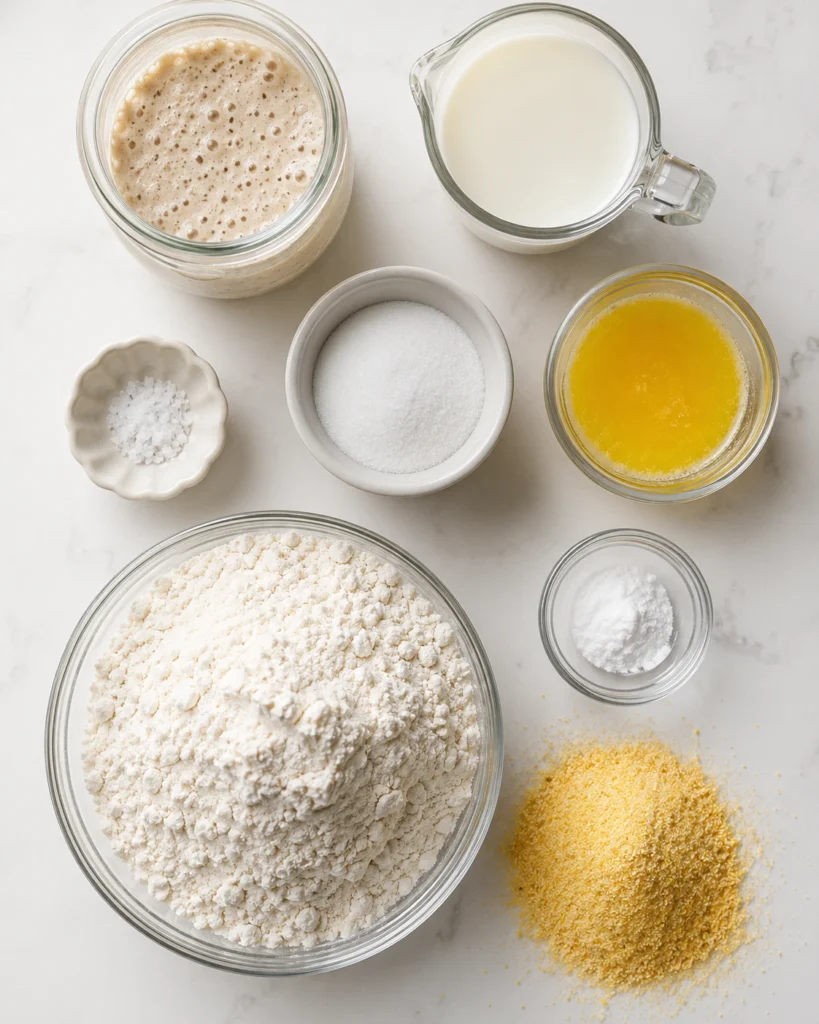
Ingredients You’ll Need
- Sourdough Starter: Use your starter when it’s at peak activity, typically 4-8 hours after feeding. It should be bubbly, doubled in size, and smell pleasantly tangy. Keep your starter in a sourdough starter jar so you can easily see when it has doubled, the clear glass makes it foolproof to track rise.
- Milk: Whole milk creates the richest flavor, but 2% works great too. You can substitute with buttermilk for extra tang.
- Flour: All-purpose flour is perfect here.
- Cornmeal: This is essential for that authentic English muffin texture and prevents sticking. Don’t skip it!
- unsalted butter, granulated sugar, salt, baking soda.
Find the whole recipe with measurements down below.
Tools You’ll Need
- Cast Iron Griddle: The secret to perfectly cooked English muffins is even, patient heat, cast iron holds temperature steadier than any other surface, giving you that deep golden crust without burning the outside before the inside is done.
- 3-Inch Round Biscuit Cutter: Press straight down (never twist) for the cleanest cut and the best rise, a proper round cutter gives you consistent, bakery-style muffins every time, no drinking glass required.
- Digital Kitchen Scale: Flour measured by weight is the single biggest factor in getting consistent nooks and crannies, multiple readers nailed their second batch after switching from cups to grams, and a scale removes that guesswork completely.
- Wide-Mouth Glass Jar (for sourdough starter): Keep your starter in a clear wide-mouth jar so you can track exactly when it doubles, the visual confirmation that it’s at peak activity is what makes the timing of this recipe foolproof.
- Wire Cooling Rack: Air circulation underneath the muffins during the 10-minute rest prevents steam buildup on the bottom crust, a small detail that keeps that signature crispy exterior intact.
How to Make Sourdough English Muffins
You’ll find the full recipe with exact measurements at the bottom of this post, but here’s a quick step-by-step overview to show you how it all comes together:
Mixing the Dough (Step 1)
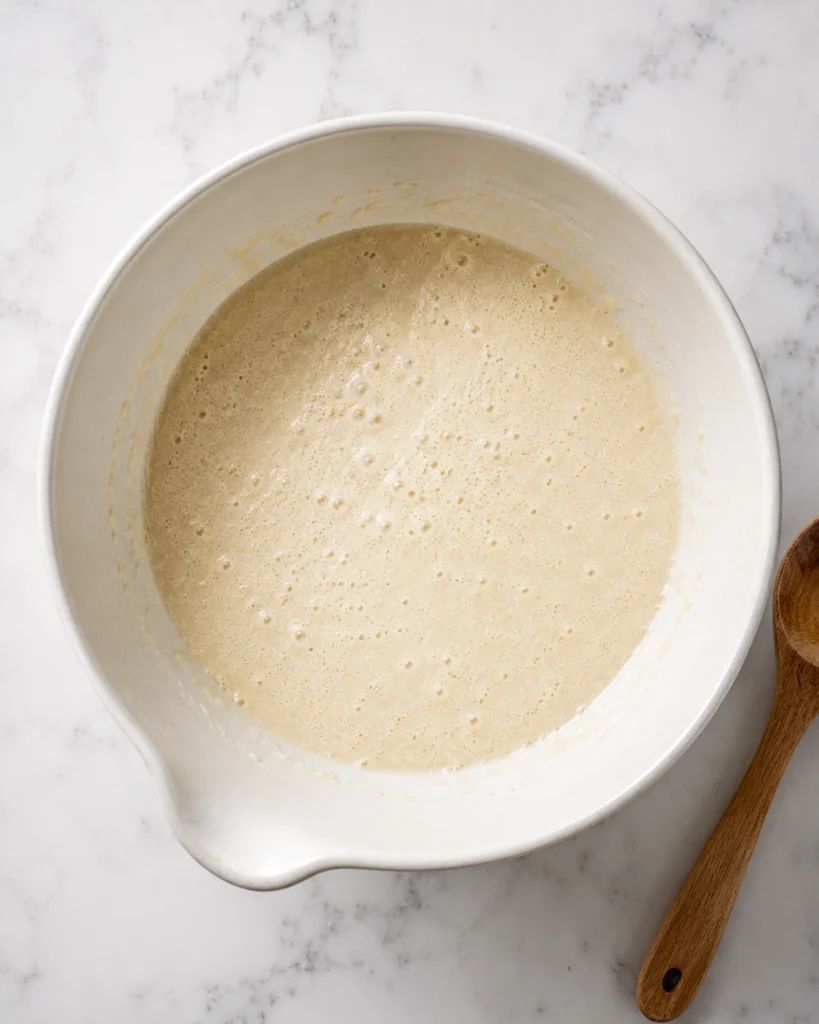
- Start by combining your active sourdough starter, lukewarm milk, melted butter, and sugar in a large mixing bowl. Whisk these together until well combined. The mixture should look creamy and slightly frothy.
- Then add the salt and 3 cups of the flour. Stir with a wooden spoon or sturdy spatula until a shaggy dough forms. It will look rough and uneven at this point, and that’s exactly right!
- Next gradually add the remaining ½ cup of flour, stirring until the dough comes together. You want a soft, slightly sticky dough that’s cohesive but not dry. If your dough seems too wet, add flour one tablespoon at a time. If it’s too dry, add milk by the teaspoon. For consistent results every time, weigh your ingredients with a digital kitchen scale, flour especially varies dramatically by how it’s scooped.
- After that, cover the bowl with a damp kitchen towel or plastic wrap and let it rest for 30 minutes. This rest period allows the flour to fully hydrate and makes the dough easier to work with.
First Rise (Bulk Fermentation, Step 2)
- After the rest period, you’re going to perform a simple stretch and fold. With wet hands, grab one side of the dough, stretch it up, and fold it over itself. Rotate the bowl 90 degrees and repeat. Do this 4 times total, working your way around the bowl.
- Then, cover the bowl again and let the dough rise at room temperature (68-72°F is ideal) for 6-8 hours, or until doubled in size. You can also do a slower, overnight rise in the refrigerator for 8-12 hours, which develops even more flavor.
Pro tip: The timing depends on your kitchen temperature and starter strength. In warmer weather, it might take just 4-5 hours. In winter, you might need 10 hours. The dough is ready when it’s puffy, jiggly, and has increased significantly in volume.
Shaping Your English Muffins (Step 3)
- After that, generously dust your work surface with flour. Sprinkle a baking sheet liberally with cornmeal (this is where your shaped muffins will rest).
- Next, turn your dough out onto the floured surface. It should be soft and slightly sticky. Gently press it into a rectangle about ¾ inch thick. Don’t use a rolling pin, your hands work better here!
- Using a 3-inch round biscuit cutter, cut out your muffins and press straight down without twisting for the best rise. You should get 10-12 muffins depending on thickness.
- Then, place each cut muffin onto the cornmeal-dusted baking sheet, then sprinkle more cornmeal on top. Cover loosely with a kitchen towel.
Second Rise (Step 4)
- Let the shaped muffins rise for 45-60 minutes at room temperature. They should look puffy and feel soft when gently pressed. They won’t necessarily double in size, but they should be noticeably puffed.
- Then about 10 minutes before you’re ready to cook, add the baking soda. Gently dissolve ½ teaspoon baking soda in 1 tablespoon of water and lightly brush or sprinkle it over the tops of the muffins. This creates those signature nooks and crannies!
Cooking Your Muffins (Step 5)
- Heat a large cast iron griddle over medium-low heat, the even heat retention is what gives you that deep, uniform golden crust without hot spots. Add a small pat of butter or a drizzle of oil.
- Then carefully transfer the muffins to your hot griddle, cornmeal side down first. Cook for 7-10 minutes on the first side. You’re looking for a deep golden brown color.
- Next, flip gently and cook for another 7-10 minutes on the second side. The muffins should feel firm but springy when gently pressed, and the sides should look cooked through.
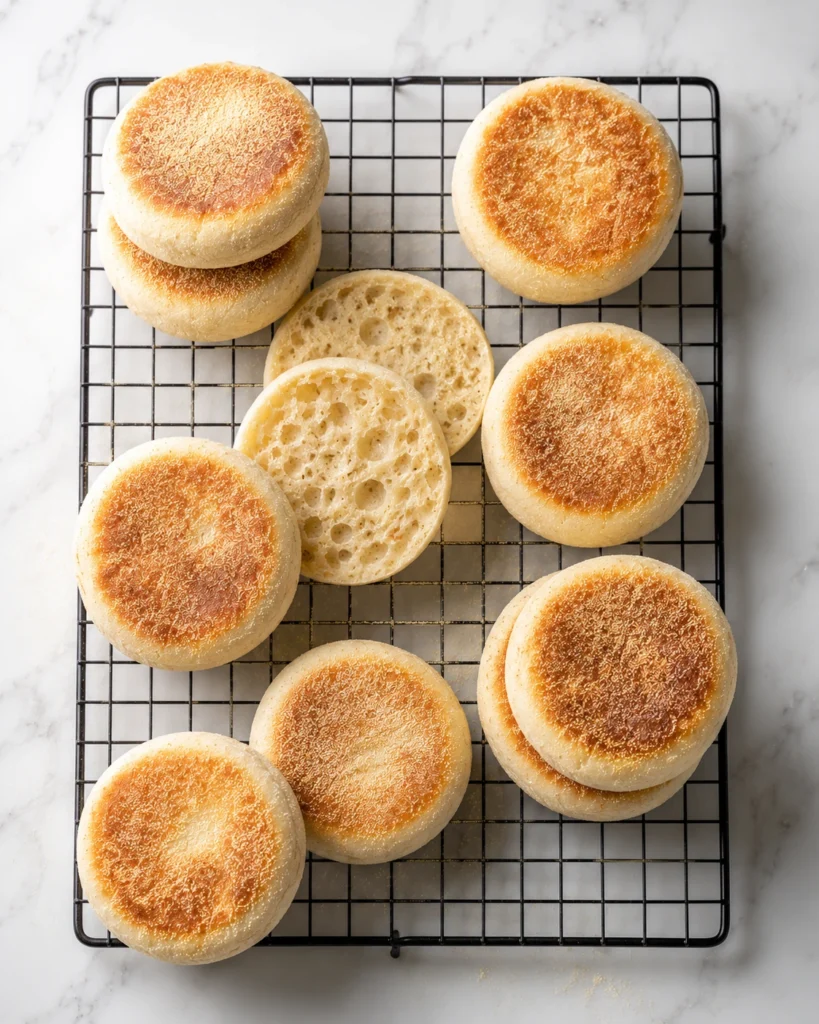
- Transfer cooked muffins to a wire cooling rack and resist the urge to split them for at least 10 minutes.
Pro Tips for Success
After making this sourdough english muffin recipe dozens of times, I’ve learned a few tricks that guarantee perfect results every single time.
Temperature Control
The key to evenly cooked English muffins is patient, low heat. If your griddle is too hot, you’ll get burnt outsides and doughy centers. Too cool, and they’ll be pale and tough. Medium-low is the sweet spot. Test with one muffin first if you’re unsure.
The Nooks and Crannies Secret
Those famous pockets come from several factors working together: proper fermentation, the baking soda addition, and never rolling your dough with a rolling pin. The gentle pressing technique preserves air bubbles that create those pockets.
Getting the Right Thickness
Three-quarters of an inch thick is ideal. Thicker muffins risk raw centers. Thinner ones won’t have enough height for dramatic nooks and crannies.
Splitting Technique
Never use a knife to cut your English muffins! Always use a fork to split them. Insert the fork tines around the middle edge and gently pry apart. This preserves the texture and creates more surface area for toasting.
Sourdough English Muffin Variations
Once you’ve mastered this basic english muffins recipe, the flavor possibilities are endless!
- Whole Wheat English Muffins: Replace up to half the all-purpose flour with whole wheat flour for a nuttier, heartier version. You may need to add 2-3 tablespoons more liquid.
- Cinnamon Raisin: Add 1 tablespoon cinnamon and ¾ cup raisins to the dough during mixing. Increase sugar to 3 tablespoons.
- Everything Bagel: Before the second rise, brush muffin tops with melted butter and sprinkle with everything bagel seasoning.
- Cheese & Herb: Fold in 1 cup shredded sharp cheddar and 2 tablespoons fresh chopped herbs (rosemary, thyme, or chives work beautifully).
- Honey Wheat: Substitute honey for the sugar and replace 1 cup of all-purpose flour with whole wheat flour.
- Top your muffins with a runny egg or go all out with our Mediterranean Baked Feta Eggs, it’s ready in under 25 minutes and pairs beautifully with the tangy muffin base.
- If you love baking your own breakfast breads, don’t miss our Pumpkin Bagels, they freeze just as beautifully and make cozy weekend mornings even easier
Storage and Reheating Instructions
These homemade English muffins stay fresh much longer than you’d expect, and they freeze like a dream!
- Room Temperature Storage: Store completely cooled muffins in an airtight container or zip-top bag for up to 3 days. They’ll stay soft and delicious.
- Refrigerator Storage: I don’t recommend refrigerating these muffins as it can make them stale faster. Room temperature or freezer storage is best.
- Freezer Storage: This is where these muffins really shine! Split them with a fork first (so much easier than trying to split frozen muffins), then freeze in a freezer bag with parchment paper between layers. They’ll keep for up to 3 months.
- Reheating: Pop frozen muffins straight into the toaster, no thawing needed! Toast until golden and crispy. You can also reheat in a 350°F oven for 10 minutes wrapped in foil.
Pro Tip: I always make a double batch and freeze most of them. It’s like having a bakery in your freezer! Perfect for busy mornings when you need a quick, wholesome breakfast.
FAQs
Can I use sourdough discard instead of active starter?
While this sourdough english muffins recipe is designed for active starter, you can modify it for discard. Use discard plus ½ teaspoon instant yeast to help with rise. The flavor will be less tangy, but still delicious!
Why didn’t my muffins have nooks and crannies?
Several factors affect this: rolling instead of pressing the dough, skipping the baking soda step, overcooking on too-high heat, or not allowing proper fermentation. Make sure you’re following each step carefully, especially the gentle handling and baking soda addition.
My muffins are dense and heavy. What went wrong?
Dense muffins usually mean the dough didn’t ferment long enough, your starter wasn’t active enough, or you added too much flour. Make sure your starter is bubbly and active, and let the dough rise until truly doubled. The dough should be soft and slightly sticky.
Can I make these without cornmeal?
Cornmeal is traditional and helps prevent sticking, but you can use semolina flour or fine polenta instead. Avoid substituting with regular flour as they’ll stick to the pan.
How do I know when they’re fully cooked?
The muffins should be deep golden brown on both sides, feel firm but springy when pressed, and the internal temperature should reach 200-205°F if you want to be precise. The sides should look fully cooked, not doughy.
Can I cook these in the oven instead?
Traditional English muffins are griddle-cooked for that distinctive texture, but you can bake them at 375°F for 10 minutes, flip, then bake another 10 minutes. They’ll be slightly different but still tasty.
My kitchen is cold. How can I help the dough rise?
Place your covered bowl in a turned-off oven with the light on. The gentle warmth from the bulb creates a perfect proofing environment. You can also use a heating pad on low under the bowl (with a towel in between).
More Easy Baking Recipes
Shop This Recipe





As an Amazon Associate, I earn from qualifying purchases. This means that if you click on an Amazon link on my site and make a purchase, I may receive a small commission at no extra cost to you.

Easy Sourdough English Muffin Recipe
Ingredients
Method
- Step 1: In a large mixing bowl, combine your active sourdough starter, lukewarm milk, melted butter, and sugar. Whisk these together until well combined. The mixture should look creamy and slightly frothy.
- Step 2: Add the salt and 3 cups of the flour. Stir with a wooden spoon or sturdy spatula until a shaggy dough forms. It will look rough and uneven at this point, and that's exactly right!
- Step 3: Gradually add the remaining ½ cup of flour, stirring until the dough comes together. You want a soft, slightly sticky dough that's cohesive but not dry. If your dough seems too wet, add flour one tablespoon at a time. If it's too dry, add milk by the teaspoon.
- Step 4: Cover the bowl with a damp kitchen towel or plastic wrap and let it rest for 30 minutes. This rest period allows the flour to fully hydrate and makes the dough easier to work with.
- Step 5: After the rest period, you're going to perform a simple stretch and fold. With wet hands, grab one side of the dough, stretch it up, and fold it over itself. Rotate the bowl 90 degrees and repeat. Do this 4 times total, working your way around the bowl.
- Step 6: Cover the bowl again and let the dough rise at room temperature (68-72°F is ideal) for 6-8 hours, or until doubled in size. You can also do a slower, overnight rise in the refrigerator for 8-12 hours, which develops even more flavor.
- Step 7: Generously dust your work surface with flour. Sprinkle a baking sheet liberally with cornmeal (this is where your shaped muffins will rest).
- Step 8: Turn your dough out onto the floured surface. It should be soft and slightly sticky. Gently press it into a rectangle about ¾ inch thick. Don't use a rolling pin, your hands work better here!
- Step 9: Using a 3-inch round cutter (or a drinking glass), cut out your muffins. Press straight down without twisting for the best rise. You should get 10-12 muffins depending on thickness.
- Step 10: Place each cut muffin onto the cornmeal-dusted baking sheet, then sprinkle more cornmeal on top. Cover loosely with a kitchen towel.
- Step 11: Let the shaped muffins rise for 45-60 minutes at room temperature. They should look puffy and feel soft when gently pressed. They won't necessarily double in size, but they should be noticeably puffed.
- Step 12: About 10 minutes before you're ready to cook, add the baking soda. Gently dissolve ½ teaspoon baking soda in 1 tablespoon of water and lightly brush or sprinkle it over the tops of the muffins. This creates those signature nooks and crannies!
- Step 13: Heat a large griddle or cast-iron skillet over medium-low heat. This is crucial, too hot and the outsides will burn before the insides cook. Add a small pat of butter or a drizzle of oil.
- Step 14: Carefully transfer the muffins to your hot griddle, cornmeal side down first. Cook for 7-10 minutes on the first side. You're looking for a deep golden brown color.
- Step 15: Flip gently and cook for another 7-10 minutes on the second side. The muffins should feel firm but springy when gently pressed, and the sides should look cooked through.
- Step 16: Transfer cooked muffins to a wire rack. They'll continue to cook a bit from residual heat. Resist the urge to split them immediately, let them cool for at least 10 minutes.





This is hands down the BEST sourdough English muffin recipe I’ve tried! The instructions were so clear and easy to follow, even for a sourdough beginner like me. Those nooks and crannies are absolutely perfect, and the flavor is incredible. My family devoured them in two days! I’ve already made three batches. Pro tip: I do the overnight rise in the fridge and cook them fresh Saturday morning. Game changer for weekend breakfast! Will never buy store-bought again.
Finally nailed it! I’ve attempted English muffins twice before with other recipes and failed miserably. This recipe is foolproof. The key was the low heat on the griddle – patience is everything! They cooked perfectly with no burnt outsides or raw centers. The baking soda trick for the nooks and crannies really works. These freeze beautifully too. Made a double batch and my freezer is stocked for weeks. 10/10 recommend!
Absolutely delicious and surprisingly easy! I was intimidated by the long rise time but the actual hands-on work is minimal. Started the dough Friday night, shaped Saturday morning, and had fresh muffins for brunch. The texture is SO much better than store-bought – light, airy, with that perfect chew. My kids asked if we could make these every weekend. Success! ❤️
Restaurant quality at home! Used these for eggs benedict and they held up perfectly under the hollandaise. The sourdough tang adds incredible depth of flavor. Followed the recipe exactly and got 12 perfect muffins. The fork-splitting tip is genius – creates so much more surface area for toasting. Already planning to try the everything bagel variation next!
Great recipe with fantastic results! My first batch didn’t have as many nooks and crannies as I wanted, but after reading the tips more carefully, I realized I was rolling the dough instead of pressing it. Second batch was PERFECT. The flavor is amazing and they’re so fun to make. Took one star off only because I wish there were more photos of the dough consistency at each stage, but otherwise excellent recipe!