

Easy Chocolate Bun Recipe
Looking for a quick breakfast? Try this easy chocolate bun recipe inspired by Japanese milk bread buns. Soft, fluffy, and full of chocolate.
Published: Mar 6, 2026 | By Ilyas Siaghy
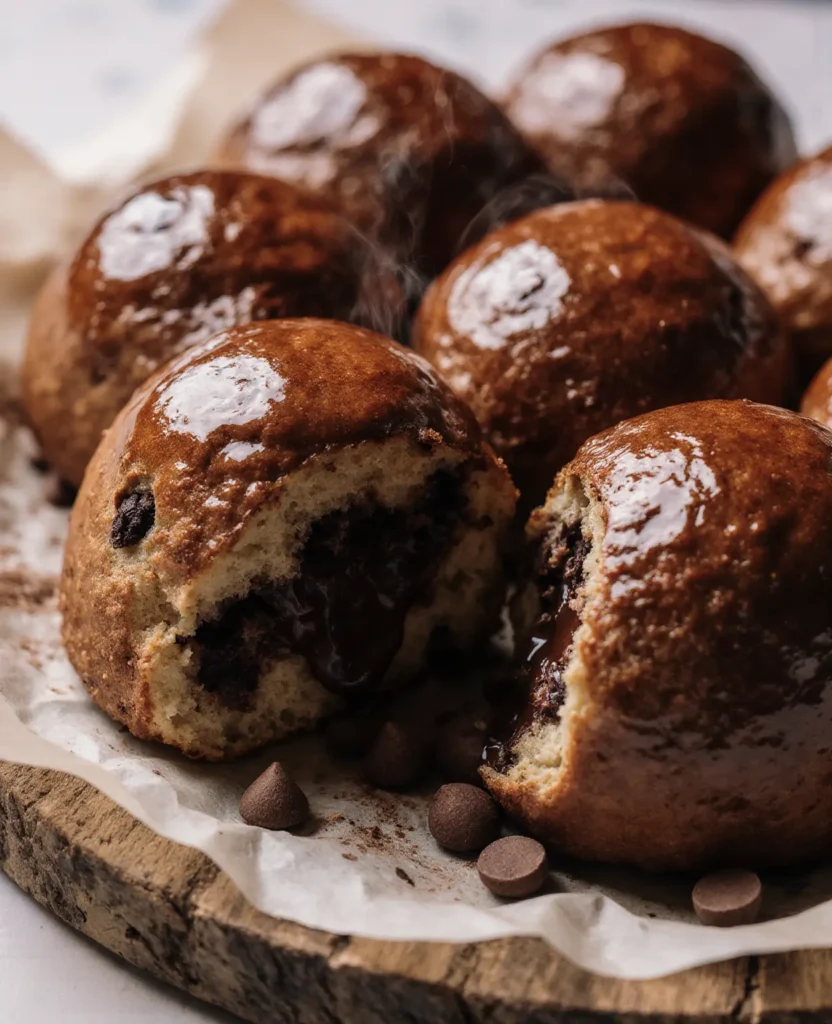
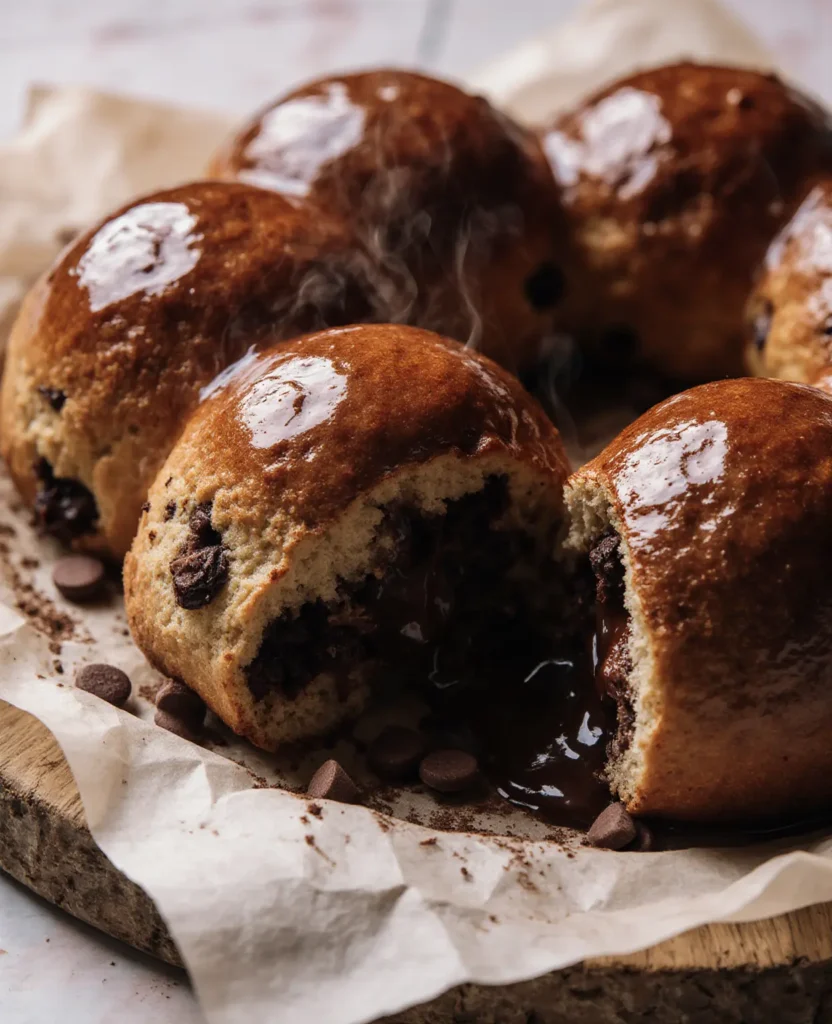
There’s something magical about the smell of freshly baked bread drifting through the kitchen, especially when chocolate is involved. The first time I made this Easy Chocolate Bun Recipe, I was looking for a sweet baking project that felt a little special but wasn’t overly complicated. What came out of the oven was a tray of unbelievably soft, fluffy buns filled with rich chocolate, so good that they disappeared before they had a chance to cool completely.
Inspired by the pillowy texture of Japanese milk bread, this Easy Chocolate Bun Recipe creates buns that are incredibly light, tender, and slightly sweet. The secret is the soft dough, which bakes up with a delicate, cloud-like texture that pairs perfectly with the rich chocolate filling. Every bite is comforting, buttery, and just indulgent enough to satisfy a sweet craving.
I love making these chocolate buns on weekends when I have a little extra time to bake. They make a wonderful breakfast, afternoon snack, or dessert alongside a cup of coffee or tea. And despite how bakery-worthy they look, they’re surprisingly approachable for home bakers. If you have a stand mixer with a dough hook, the kneading takes only 5–6 minutes. Don’t worry if you don’t, I’ll show you the hand-kneading method too.
If you’ve been searching for the best Easy Chocolate Bun Recipe, you’re in the right place. These Japanese-inspired milk bread buns are soft, fluffy, and filled with delicious chocolate flavor. Whether you’re baking for family, friends, or simply treating yourself, this recipe is sure to become a favorite you’ll want to make again and again.
Tools You’ll Need
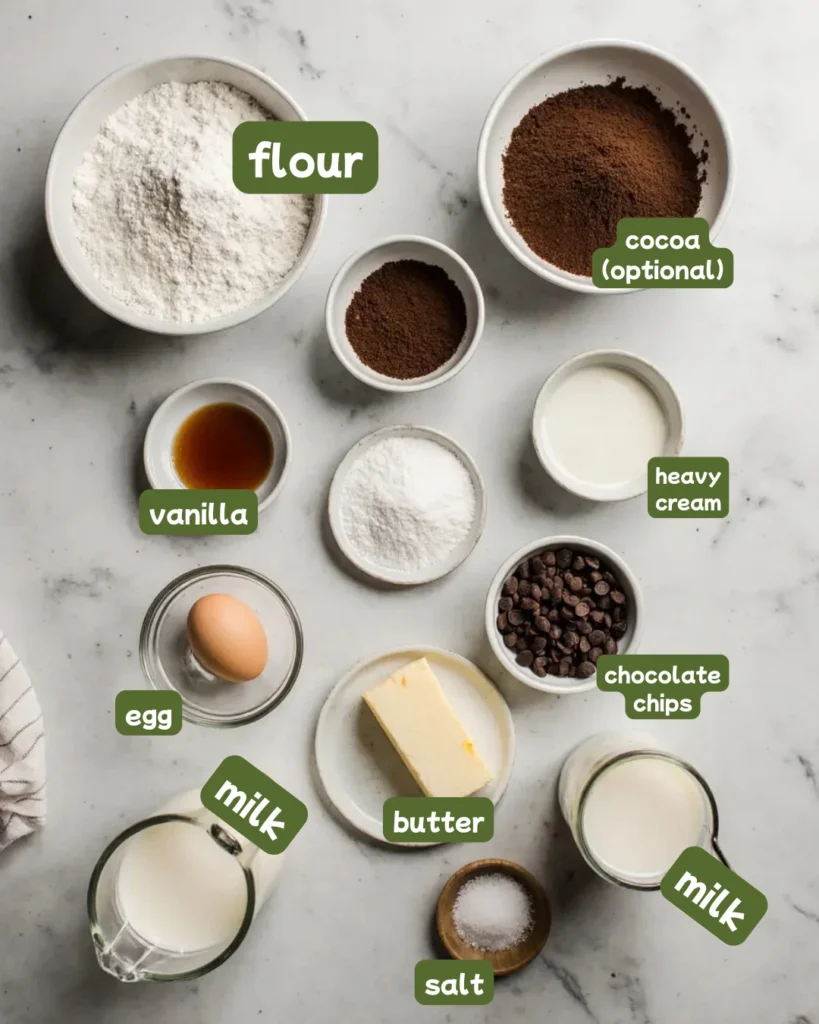
Ingredients for Your Easy Chocolate Bun Recipe
Tangzhong (Flour Paste)
- 3 tablespoons (25g) bread flour
- ½ cup (120ml) whole milk
Chocolate Dough
- 2¾ cups (350g) bread flour, plus extra for dusting
- ¼ cup (25g) unsweetened cocoa powder
- ¼ cup (50g) granulated sugar
- 1 teaspoon salt
- 2¼ teaspoons (7g / 1 packet) instant yeast
- ½ cup (120ml) warm whole milk (around 110°F / 43°C)
- 1 large egg, room temperature
- 3 tablespoons (45g) unsalted butter, softened
- All of the Tangzhong from above
Chocolate Filling
- ½ cup (90g) semi-sweet chocolate chips or chopped chocolate, I use Nestle semi-sweet chocolate chips for the ganache, they melt beautifully and have that deep, slightly bitter flavor that balances the sweet dough.
- 2 tablespoons (30ml) heavy cream
- 1 tablespoon (15g) unsalted butter
Egg Wash & Topping
- 1 egg + 1 tablespoon milk (for egg wash)
- Optional: extra chocolate chips, powdered sugar, or a simple chocolate drizzle for topping
Ingredient Sourcing Tip: Bread flour (rather than all-purpose) is key here, it has a higher protein content that gives these buns their signature chew. You can find it at most grocery stores. For the cocoa powder, go with a good-quality unsweetened variety. Dutch-process cocoa powder gives a deeper, richer color if you can find it! This is my favorite brand for baking.
How to Make Japanese Chocolate Buns (Step by Step)
Make the Tangzhong (Step 1)
- Add the bread flour and milk to a small saucepan over medium-low heat.
- Whisk constantly until the mixture thickens into a smooth, pudding-like paste about 3 to 5 minutes.
- Remove from heat and let it cool to room temperature. You can spread it on a plate to speed this up.
- Set aside, this paste is your secret weapon for ultra-soft buns!
Activate the Yeast (Step 2)
- Warm your milk to about 110°F (43°C), it should feel warm on your wrist but not hot.
- Add the instant yeast and a pinch of sugar to the warm milk and stir gently.
- Let it sit for 5 to 10 minutes until it looks foamy and bubbly.
- If it doesn’t foam, your yeast may be old or the milk was too hot, start fresh before continuing.
Make the Chocolate Dough (Step 3)
- In a large mixing bowl, whisk together the bread flour, cocoa powder, sugar, and salt.
- Make a well in the center of the dry ingredients.
- Add the activated yeast mixture, egg, and cooled Tangzhong paste to the well.
- Mix everything together with a wooden spoon or your hands until a shaggy dough forms.
- Turn the dough out onto a lightly floured surface and knead for 8 to 10 minutes by hand (or 5 to 6 minutes on medium speed with a stand mixer with a dough hook, if you bake bread regularly, this is the best investment you’ll make).
- Once the dough is smooth and slightly tacky (not sticky), add the softened butter one tablespoon at a time.
- Continue kneading for another 5 minutes until the butter is fully incorporated and the dough is smooth, elastic, and pulls away from your hands cleanly.
Beginner Tip: The dough will feel sticky when you add the butter, don’t panic and don’t add more flour! Keep kneading. It will come together. Trust the process!
First Rise (Step 4)
- Shape the dough into a ball and place it in a lightly greased bowl.
- Cover tightly with plastic wrap or a damp kitchen towel.
- Let it rise in a warm spot for 1 to 1.5 hours, or until doubled in size.
- A good trick: preheat your oven to 200°F, turn it off, then place your covered dough inside with the door cracked open.
Make the Chocolate Filling (Step 5)
- While the dough rises, combine chocolate chips, heavy cream, and butter in a small microwave-safe bowl.
- Microwave in 20-second bursts, stirring between each, until fully melted and smooth.
- Stir until glossy, then refrigerate for 20 to 30 minutes until it firms up into a scoopable ganache.
- Once chilled, divide the ganache into 12 equal portions (about 1 teaspoon each) and place on a parchment-lined plate. Freeze for 15 minutes for easiest handling.
Shape the Buns (Step 6)
- Once doubled, punch down the dough and turn it out onto a lightly floured surface.
- Divide the dough into 12 equal pieces (use a kitchen scale for best results, each piece should be around 60–65g). This is one of those tools that costs under $15 and transforms your baking.
- Flatten each piece into a round disc about 3 to 4 inches wide.
- Place one frozen ganache portion in the center of each disc.
- Pull the edges of the dough up and around the filling, pinching tightly to seal. Roll gently between your palms to form a smooth ball.
- Place each bun seam-side down on a parchment-lined baking sheet, spacing them about 2 inches apart.
Second Rise (Step 7)
- Cover the shaped buns loosely with plastic wrap or a clean kitchen towel.
- Let them rise again for 30 to 45 minutes until puffy and nearly doubled.
- Meanwhile, preheat your oven to 350°F (175°C).
Bake to Perfection (Step 8)
- Whisk together the egg and milk for your egg wash.
- Gently brush each bun with the egg wash for a glossy, golden finish.
- Optionally, press a few extra chocolate chips on top of each bun.
- Bake for 16 to 18 minutes, until the tops are set and a toothpick inserted into the bread (not the filling) comes out clean.
- Remove from the oven and let cool on the tray for 5 minutes before moving to a wire rack.
- For an extra indulgent finish, drizzle with melted chocolate once cooled slightly.
Pro Tips, Variations & Substitutions
Pro Tips for the Fluffiest Buns
- Don’t skip the Tangzhong. It’s the entire reason these buns stay soft for days. Five minutes, maximum effort.
- Use room temperature ingredients. Cold eggs or cold milk can slow down your yeast and result in dense buns.
- Seal your buns tightly. If the seam opens during baking, the filling will leak out. Pinch firmly and place seam-side down.
- Don’t overbake. These buns should look barely done when you pull them, they continue cooking as they cool.
Variations to Try
- Double chocolate bun recipe: Add mini chocolate chips directly into the dough during the final kneading stage for extra chocolate in every bite.
- Easy chocolate bun recipe with cocoa powder only: Skip the ganache filling and add 2 extra tablespoons of cocoa powder to the dough for a simpler, chocolate-through-and-through bun.
- Nutella filling: Swap the ganache for frozen Nutella portions, scoop and freeze them just like the ganache.
- Mocha version: Add 1 teaspoon of instant espresso powder to the dough for a coffee-chocolate flavor.
- White chocolate filling: Use white chocolate chips in the ganache for a twist on the classic.
Dietary Modifications
- Dairy-free: Substitute oat milk or coconut milk for whole milk, use dairy-free butter, and choose dairy-free chocolate.
- Egg-free: Use a flax egg (1 tablespoon flaxseed meal + 3 tablespoons water) in the dough, and skip the egg wash (brush with melted butter instead).
Storage & Reheating Instructions
These Asian chocolate buns store beautifully which is great news for anyone trying to meal prep breakfasts for the week!
- Room Temperature: Store in an airtight container for up to 2 days. Place a sheet of paper towel inside to absorb any extra moisture.
- Refrigerator: Keeps well for up to 4 to 5 days in a sealed container. Note: refrigerating bread can dry it out faster, so reheating is key.
- Freezer: These buns freeze exceptionally well. Once completely cooled, wrap each bun individually in plastic wrap and place in a freezer bag. Freeze for up to 2 months.
How to Reheat
- Microwave: 20 to 30 seconds per bun, covered with a damp paper towel to restore softness.
- Oven: 5 minutes at 325°F (160°C) wrapped in foil, this is the best way to bring them back to life.
- Air Fryer: 3 minutes at 300°F for a slightly crisp exterior with a soft, warm center.
💡 Make-Ahead Tip for Busy Families: Shape the buns, complete the second rise, then cover and refrigerate overnight. In the morning, pull them out while you preheat the oven, let them sit for 15 minutes, then bake fresh. Hot chocolate buns in the morning with almost zero morning effort.
Easy Chocolate Bun Recipe FAQs
Can I make this easy chocolate bun recipe without bread flour?
Yes! All-purpose flour works as a substitute, but your buns will be slightly less chewy and structured. For the closest result, use bread flour. If you only have all-purpose, add an extra tablespoon to the dough since AP flour absorbs moisture a little differently.
Why didn’t my buns rise?
The most common culprits are: yeast that’s past its expiration date, milk that was too hot (above 120°F kills yeast), or a drafty kitchen. Always proof your yeast first (Step 2) and make sure you see foam before continuing. If in doubt, use fresh yeast and try again!
Can I make these as Japanese chocolate buns without the filling?
Absolutely. They’re delicious as a pure chocolate milk bread bun with no filling at all. Just shape into smooth balls and bake. You can add a chocolate drizzle on top afterward for visual appeal.
My filling leaked — what did I do wrong?
Two likely causes: the ganache wasn’t frozen firm enough before wrapping, or the bun wasn’t sealed tightly. Make sure to freeze your ganache portions for at least 15 minutes before shaping, and really pinch that seam shut. Always bake seam-side down!
Can I use active dry yeast instead of instant yeast?
Yes, just use the same amount (2¼ teaspoons) and make sure to properly activate it in warm milk for 10 minutes before adding to the dough. Instant yeast can be added directly to dry ingredients; active dry yeast cannot, so don’t skip the proofing step.
How do I know when the buns are done baking?
The tops should look set and matte (not shiny or raw-looking). A toothpick inserted into the bready part (avoiding the filling) should come out with no wet dough. The internal temperature of the bread should be around 190°F (88°C) if you’re using a an instant-read thermometer makes this foolproof. I check every bake.
Can I make smaller or larger buns?
Absolutely! For slider-sized buns, divide the dough into 16 pieces and reduce bake time by 2 to 3 minutes. For larger bakery-style buns, divide into 8 pieces and add 3 to 4 minutes to the bake time. Keep an eye on them either way.
Try These Recipes Next:

Easy Chocolate Bun Recipe (Japanese Milk Bread Buns)
Ingredients
Equipment
Method
- Cook the Tangzhong paste: Add 3 tablespoons bread flour and 1/2 cup milk to a small saucepan over medium-low heat. Whisk constantly until the mixture thickens into a smooth, pudding-like paste, about 3 to 5 minutes.
- Cool the Tangzhong: Remove from heat and let the Tangzhong cool to room temperature. Spread it on a plate to speed up cooling. Set aside.
- Proof the yeast: Warm 1/2 cup of milk to 110°F (43°C). Add the instant yeast and a pinch of sugar. Stir gently and let sit for 5 to 10 minutes until foamy and bubbly. If no foam forms, discard and start again with fresh yeast.
- Combine dry ingredients: In a large mixing bowl, whisk together 2 3/4 cups bread flour, cocoa powder, sugar, and salt. Make a well in the center.
- Form the dough: Add the activated yeast mixture, egg, and cooled Tangzhong to the well. Mix with a wooden spoon or your hands until a shaggy dough forms. Turn out onto a floured surface and knead for 8 to 10 minutes by hand (or 5 to 6 minutes with a dough hook).
- Add butter: Once smooth and slightly tacky, add the softened butter one tablespoon at a time. Knead for another 5 minutes until fully incorporated and the dough is smooth and elastic.
- Let the dough rise: Shape the dough into a ball and place in a lightly greased bowl. Cover tightly with plastic wrap or a damp kitchen towel. Let rise in a warm spot for 1 to 1.5 hours until doubled in size.
- Make the ganache: Combine chocolate chips, heavy cream, and butter in a microwave-safe bowl. Microwave in 20-second bursts, stirring between each, until fully melted and smooth.
- Chill and portion the filling: Refrigerate the ganache for 20 to 30 minutes until firm. Divide into 12 equal portions and freeze for 15 minutes for easiest handling.
- Divide and flatten the dough: Punch down the risen dough and divide into 12 equal pieces (about 60–65g each). Flatten each piece into a round disc about 3 to 4 inches wide.
- Fill and seal the buns: Place one frozen ganache portion in the center of each disc. Pull the dough edges up and over the filling, pinching tightly to seal. Roll into a smooth ball and place seam-side down on a parchment-lined baking sheet.
- Second rise: Cover the shaped buns loosely and let rise for 30 to 45 minutes until puffy. Preheat oven to 350°F (175°C) during this time.
- Apply egg wash and bake: Brush each bun gently with egg wash (1 egg + 1 tablespoon milk). Optionally press extra chocolate chips on top. Bake for 16 to 18 minutes until tops are set. Cool on the tray for 5 minutes before transferring to a wire rack.



I tried this easy chocolate bun recipe over the weekend and it turned out amazing! The buns were incredibly soft and fluffy, just like the Japanese milk bread buns you get at a bakery. The chocolate inside melted perfectly and made every bite so delicious. I was a little nervous about making bread at home, but the instructions were simple and easy to follow. My family finished the whole batch the same day and already asked me to make them again for breakfast. Definitely saving this recipe!